To create a promissory note template with pre-filled or predefined information fields, follow the next steps:
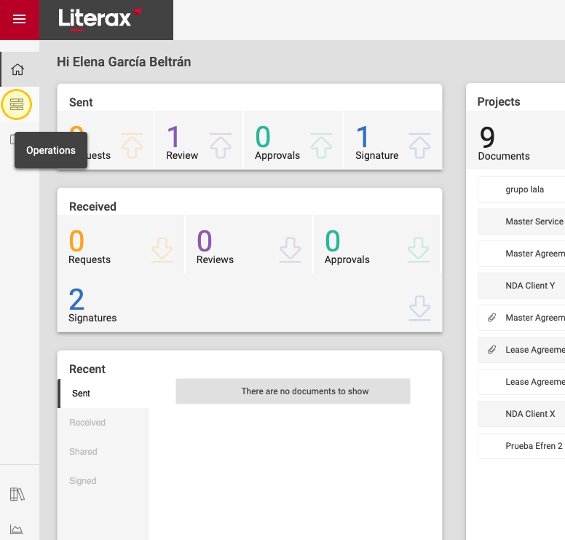
1. Go to Home and click Operations.
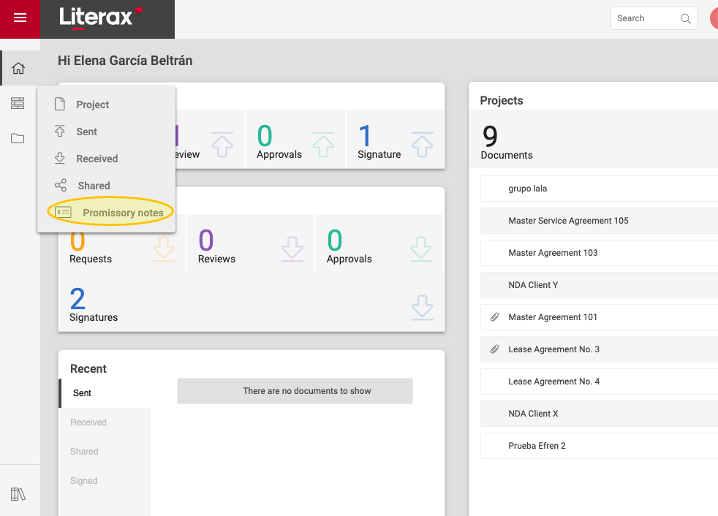
2. From the drop-down menu, select Promissory Notes.
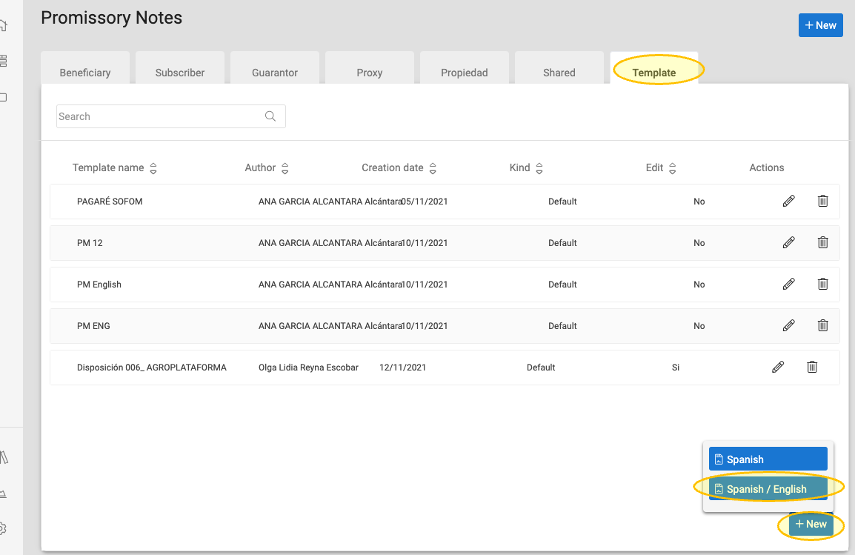
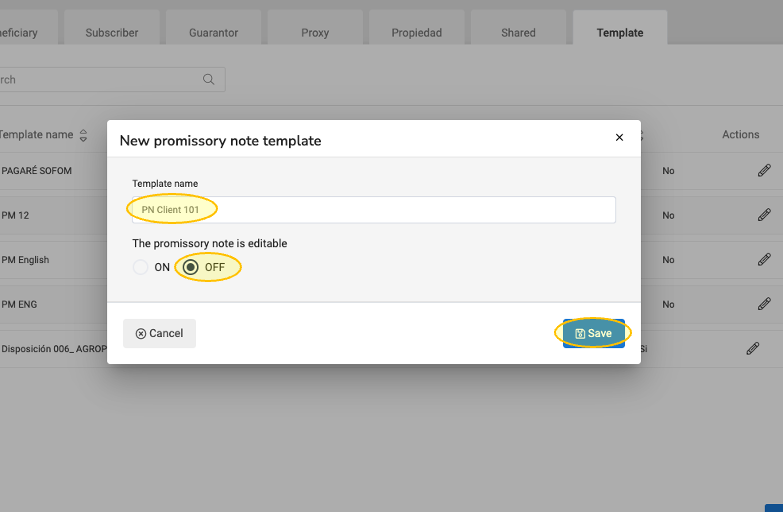
3. Then, select the Template tab, followed by New located at the bottom right and choose the language of the promissory note.
4. Choose a name for the promissory note template.
5. If you wish for the promissory note to be editable click On. Otherwise, select Off. Then, click Save.
Remember that this template will be available for all the account users.
6. The template of the promissory note will appear next, and you need to add all the information shown in the template as predefined or pre-filled.
For this purpose, open each of the tabs of the bar on the right and add any necessary fields.
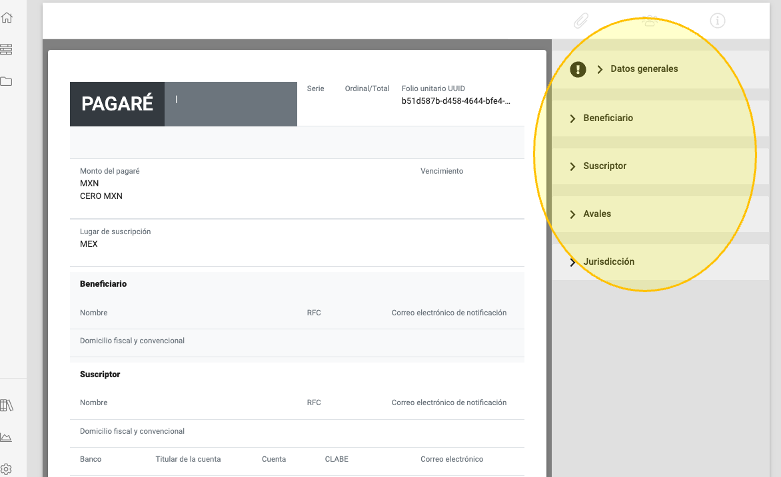
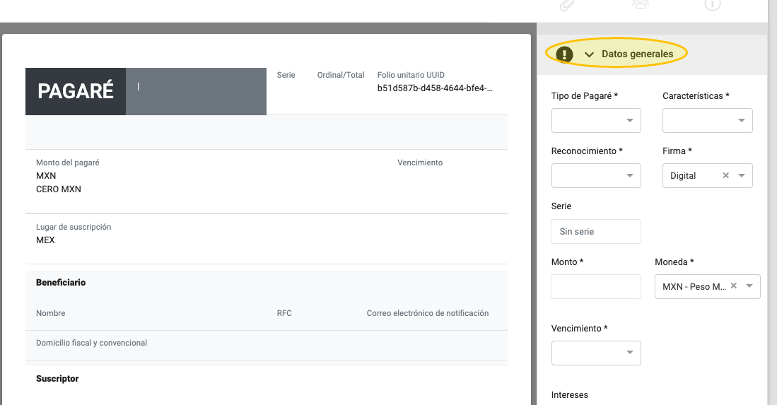
Remember: The Datos Generales tab needs to be completed to save the pre-filled template. The other items are optional.
7. Once the information has been added to the template, click Save.
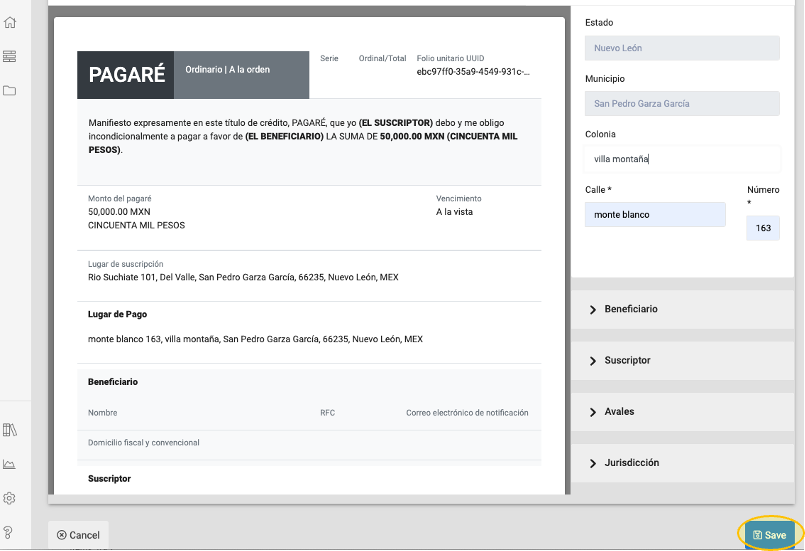
8. Your pre-filled promissory note template has been created.
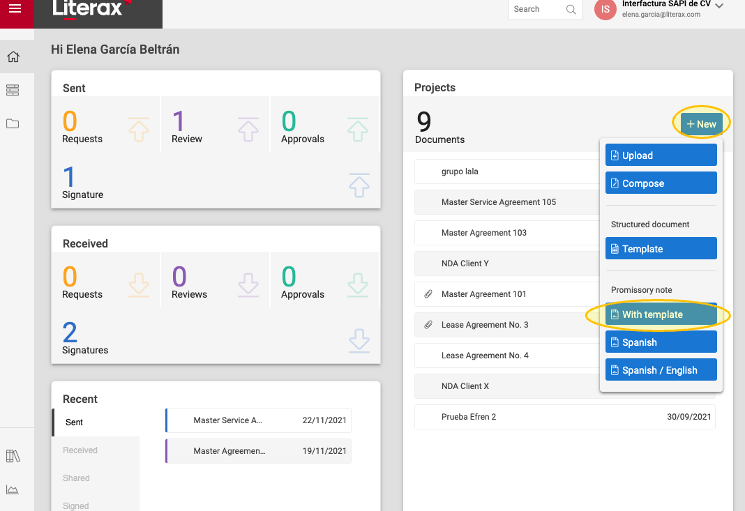
9. To use a template, click New and from the drop-down menu click Promissory Note With Template.
10. Select the pre-filled template and click Save.
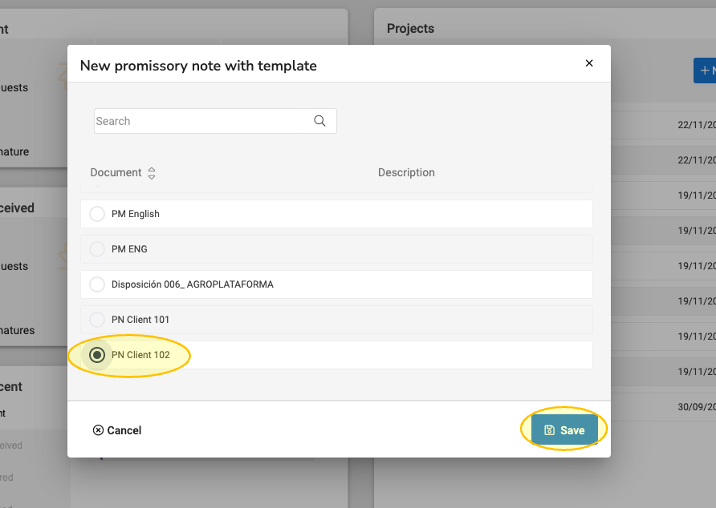
Now all the account users can use the pre-filled promissory note template that you just created.
Additionally, if you are an account superadmin and you wish your users to only generate promissory notes using the pre-filled templates, follow the next steps:
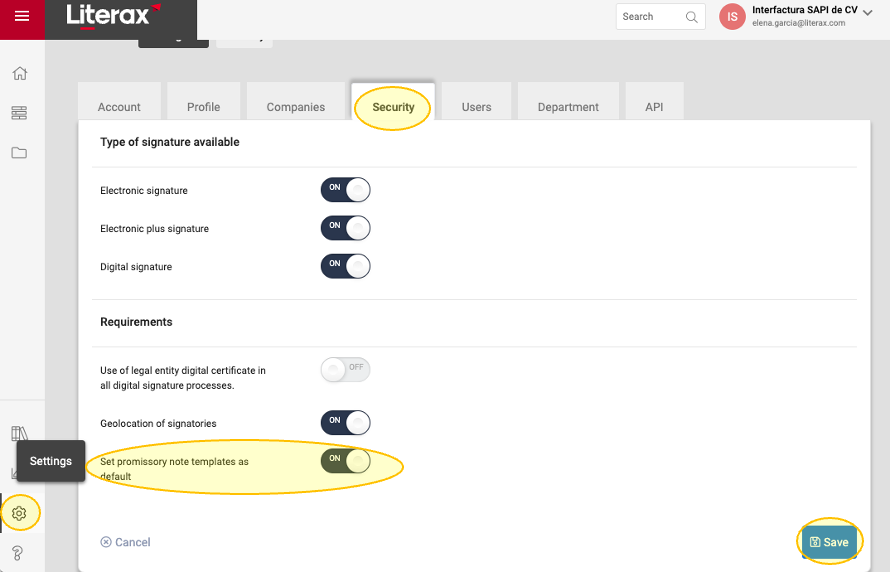
1. Go to Home and click Settings.
2. On the Security tab, activate the option “Set promissory note templates as default” and click Save.